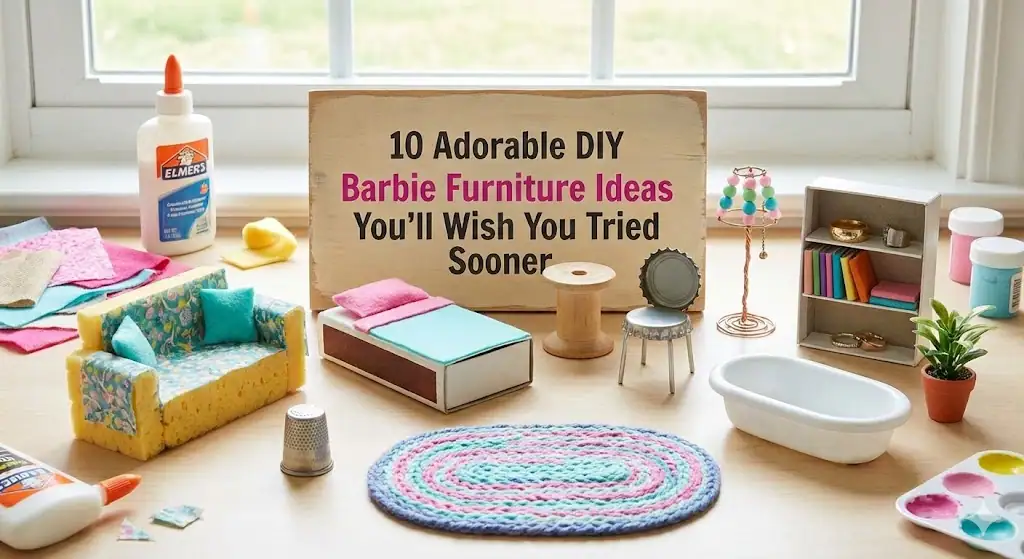
Let’s be honest — Barbie’s dream house doesn’t have to break your wallet, and those tiny, overpriced furniture sets at toy stores? Yeah, they’re cute… but they’re also wildly expensive for something that could literally fit in your palm. 😅
If you’re a Barbie lover (or a parent of one), you already know how much fun it is to design mini furniture. And the best part? You can make stunning DIY Barbie furniture using stuff you already have lying around the house — cardboard, popsicle sticks, old fabric, bottle caps, and a pinch of creativity.
So grab your glue gun, your inner child, and a bit of patience, because we’re about to make 10 adorable DIY Barbie furniture pieces that’ll make your dollhouse look like Barbie just hired an interior designer.
1. DIY Barbie Bed — Because Barbie Deserves Her Beauty Sleep 😴
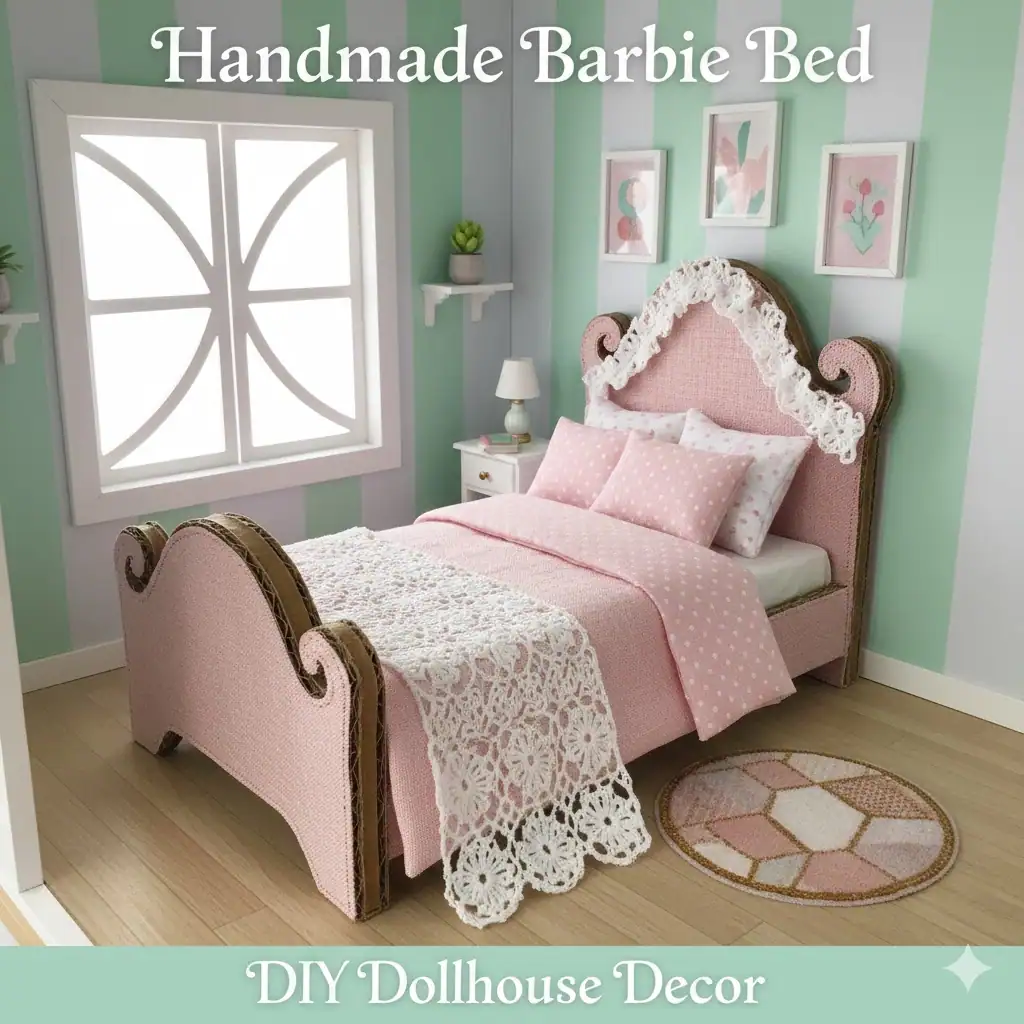
Nothing screams “home sweet home” like a cozy Barbie bed. And guess what? You can make one in 15 minutes flat.
Materials
- Cardboard or thick craft foam
- Fabric scraps (for mattress and blanket)
- Cotton or sponge (for cushioning)
- Glue gun or craft glue
- Scissors
Steps
- Cut the base: Make a rectangle about 6 inches long and 3 inches wide for Barbie’s bed base.
- Add legs: Cut four equal cardboard rectangles (or use bottle caps) for legs and glue them underneath.
- Make the mattress: Wrap some sponge with fabric and glue it to the base.
- Add a headboard: Cut a cute curved piece from cardboard, cover it with fabric, and stick it to the back.
- Decorate: Use ribbon, lace, or tiny pillows to give it a dreamy look.
Pro tip: Add a small piece of lace at the edge of the blanket — it instantly makes it look fancy, like Barbie shops at a mini IKEA.
2. DIY Barbie Sofa — Because Movie Nights Need Style 🍿
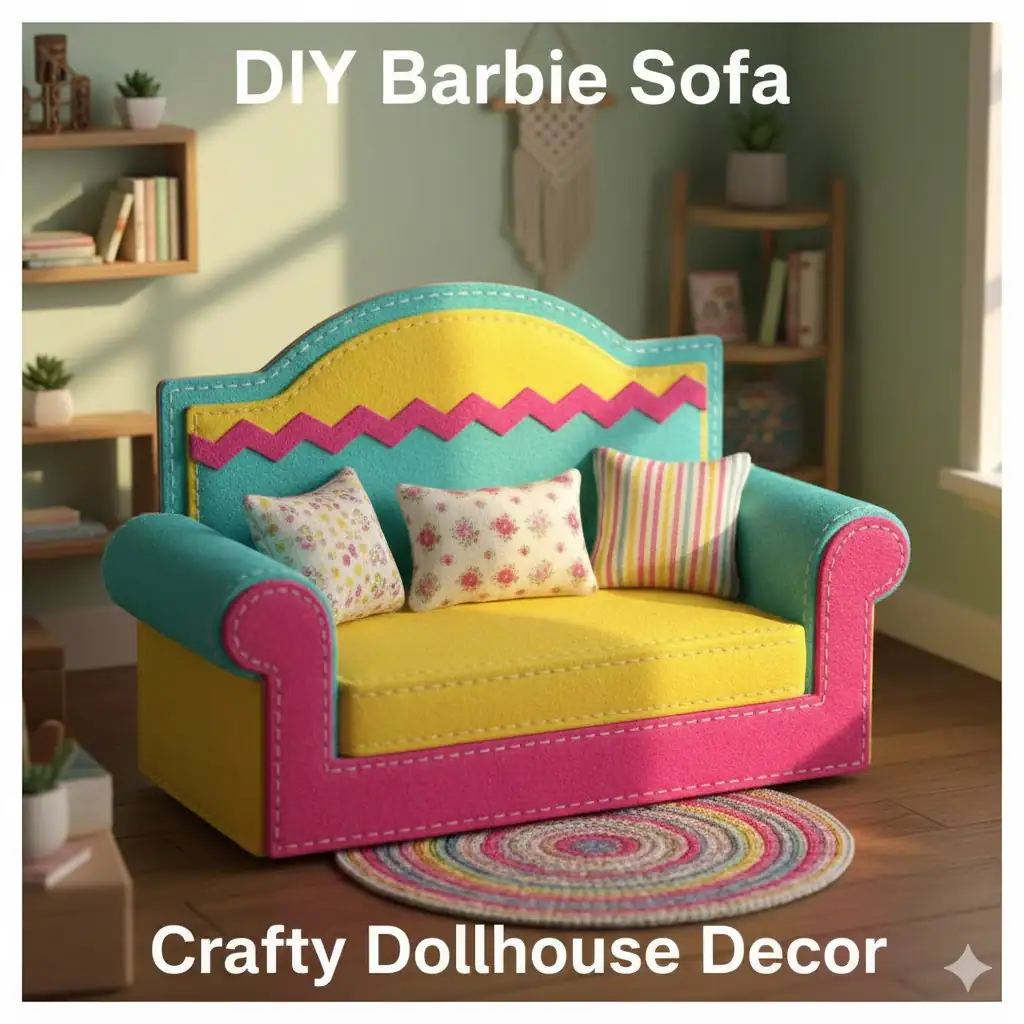
Ever wondered why Barbie lounges on plastic chairs in stock photos? Not anymore! You’re about to make her a proper couch.
Materials
- Empty tissue box
- Old cloth or felt
- Sponge
- Glue gun
- Buttons or beads (for details)
Steps
- Cut the box: Slice the tissue box in half (lengthwise) to create the sofa shape.
- Add cushioning: Line it with sponge for comfort (because Barbie deserves it).
- Wrap in fabric: Use felt or soft cloth to wrap the entire sofa neatly.
- Make armrests: Roll some sponge or cardboard pieces, wrap them, and glue them on each side.
- Decorate: Add tiny buttons as “couch cushions” or stitch lines for a designer look.
FYI, you can even make a matching ottoman with a bottle cap and some extra sponge. It’s tiny luxury at its best.
3. DIY Barbie Coffee Table — Tiny Table, Big Style ☕
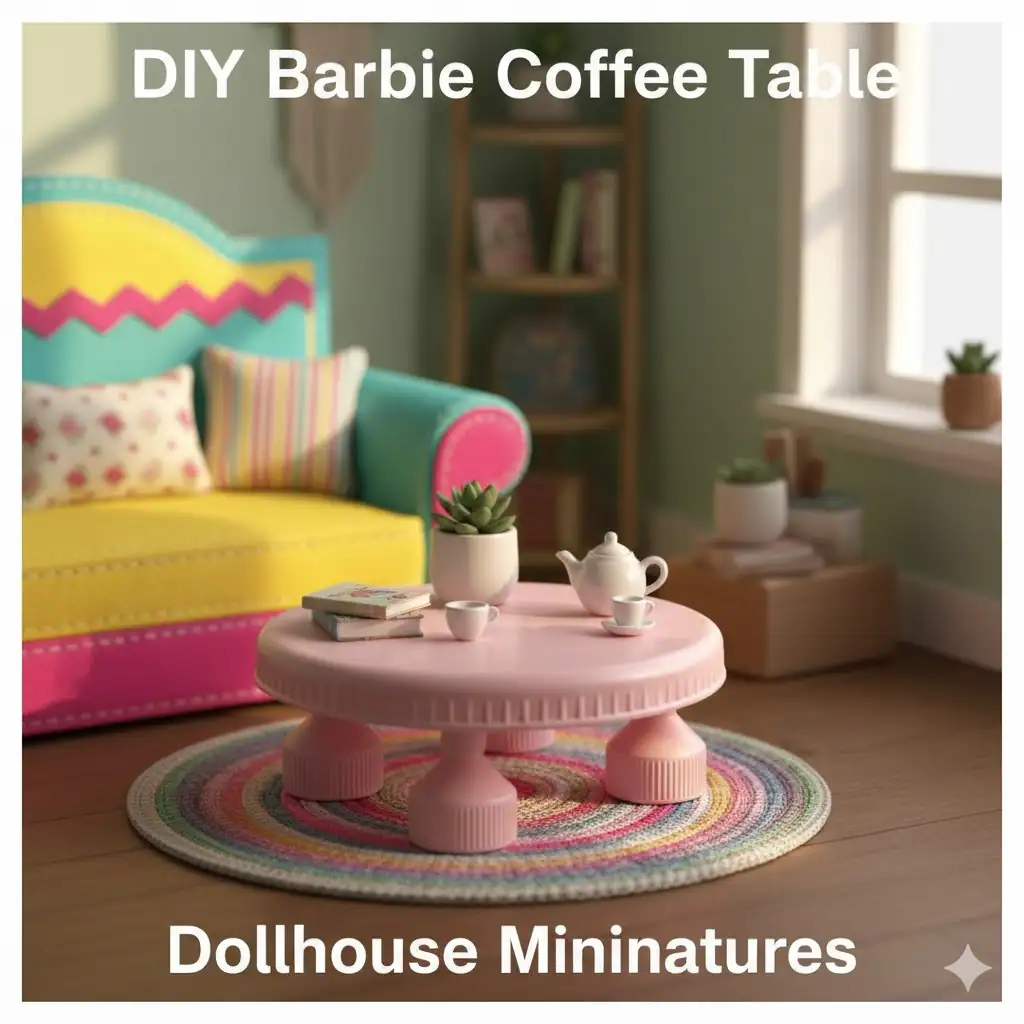
Every living room needs a chic coffee table. And you can make one in under 5 minutes!
Materials
- Bottle caps (2–3 for legs)
- A round cardboard or plastic lid
- Glue and paint
Steps
- Make the tabletop: Use a circular lid (from yogurt or Pringles).
- Add legs: Glue bottle caps evenly underneath.
- Paint it: Choose pastel shades like pink, white, or mint for that Barbie aesthetic.
- Optional bling: Add a sticker or glitter for some glam sparkle.
It’s so easy that you might end up making three of them. (Don’t say I didn’t warn you.)
4. DIY Barbie Closet — For All Those Tiny Dresses 👗
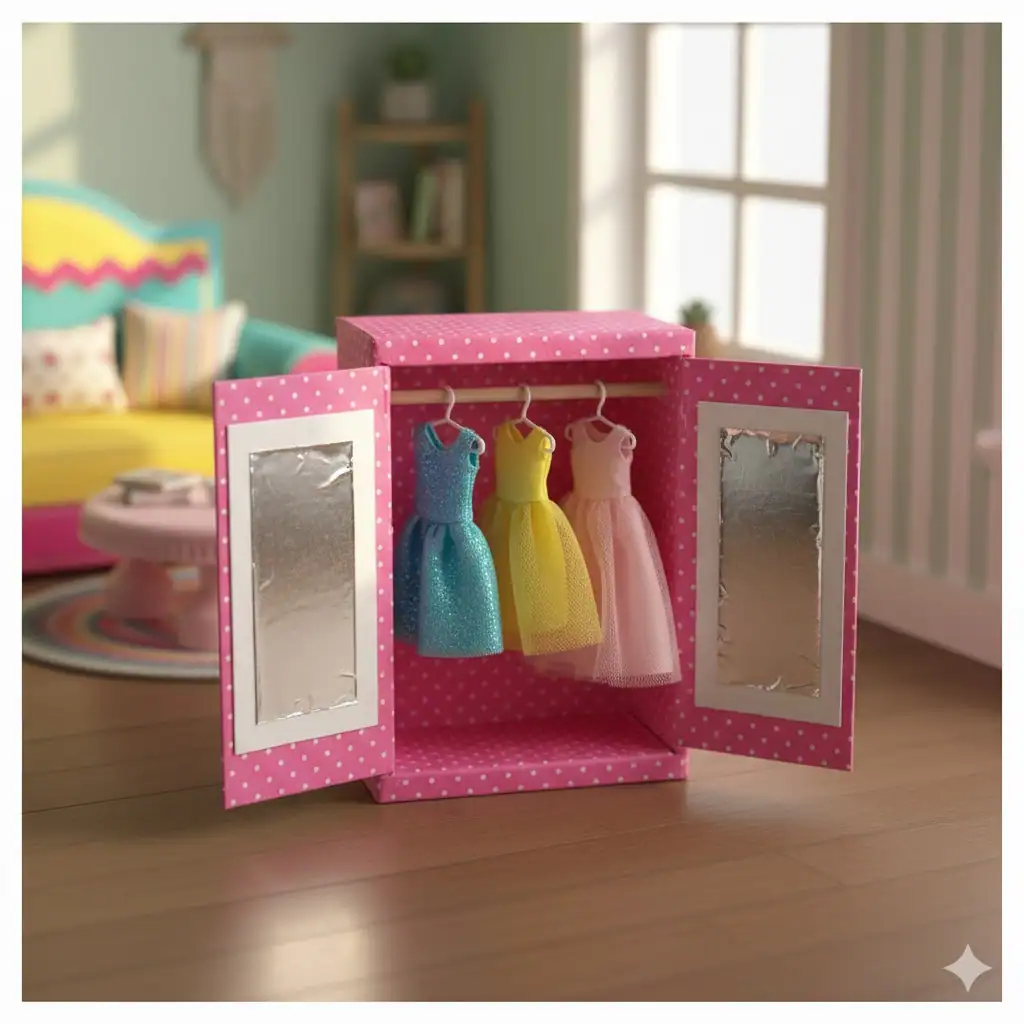
Barbie’s wardrobe game is strong. Let’s give her a closet that matches.
Materials
- Small cardboard box
- Skewer sticks or straws (for hanging rods)
- Decorative paper
- Glue and scissors
Steps
- Prep the box: Use a small shoebox or gift box as the closet frame.
- Line it: Cover the inside with decorative paper or wrapping paper.
- Add a hanging rod: Poke holes on the sides and insert a straw or skewer stick.
- Add shelves: Glue in small cardboard pieces to create compartments.
- Decorate: Add stickers, tiny handles, or even a mirror (made from foil).
You’ll instantly feel like Barbie’s personal stylist when you see her clothes hanging perfectly. 😍
5. DIY Barbie Dining Table and Chairs — Because Barbie Likes to Host 🍽️
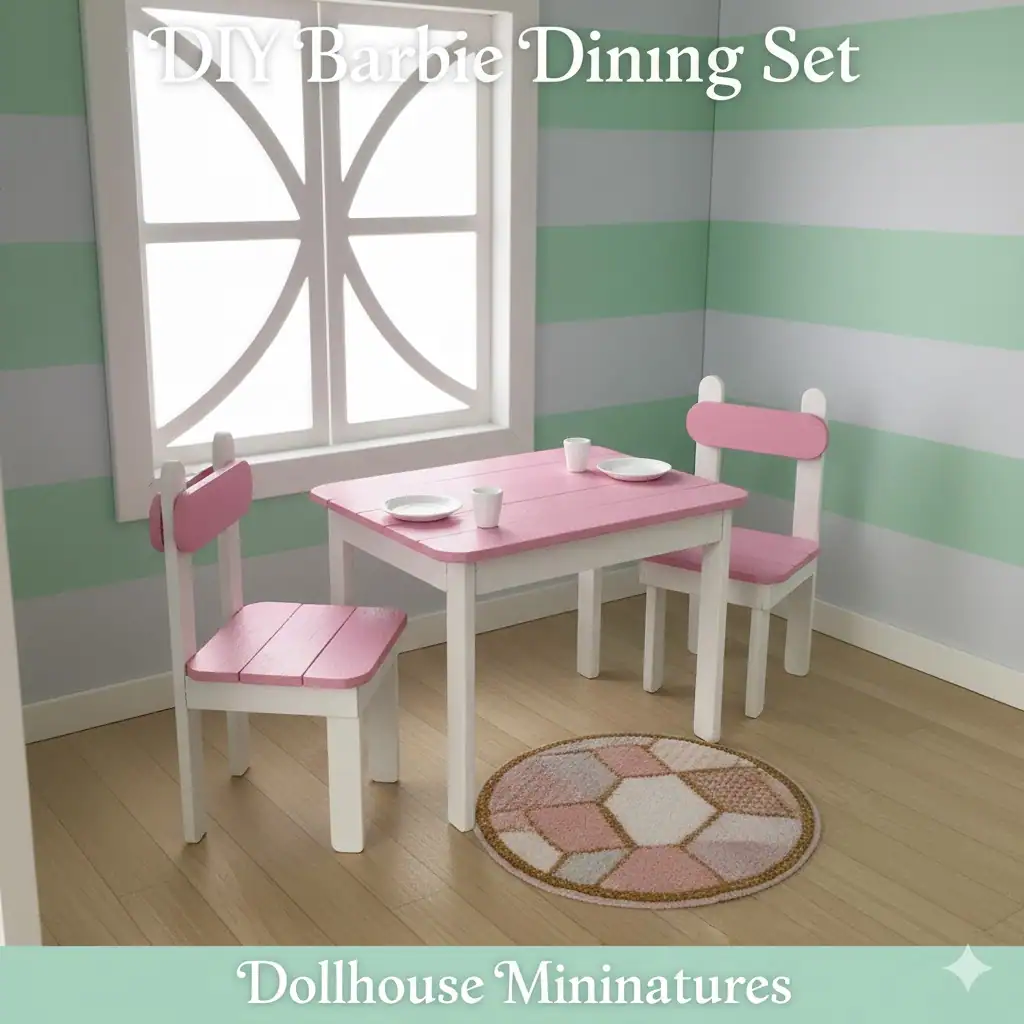
If Barbie could talk, she’d say, “Where’s my dining set?” So let’s make one that even Ken would approve of.
Materials (Table)
- Cardboard
- Popsicle sticks
- Bottle caps (for chair legs)
- Paint, glue, and fabric
Steps for the Table
- Cut a rectangle: Make the tabletop about 4×3 inches.
- Add legs: Use four popsicle sticks cut to equal length.
- Glue and paint: Assemble and paint in Barbie’s favorite color — pink, obviously.
Steps for the Chairs
- Use bottle caps: As the seat base.
- Add backrests: Glue popsicle sticks upright behind them.
- Paint and wrap: Add fabric on top for cushioning.
Voilà! Barbie’s dinner party setup is ready. Add a tiny paper plate and you’re golden.
6. DIY Barbie Vanity Table — Glam Central 💄
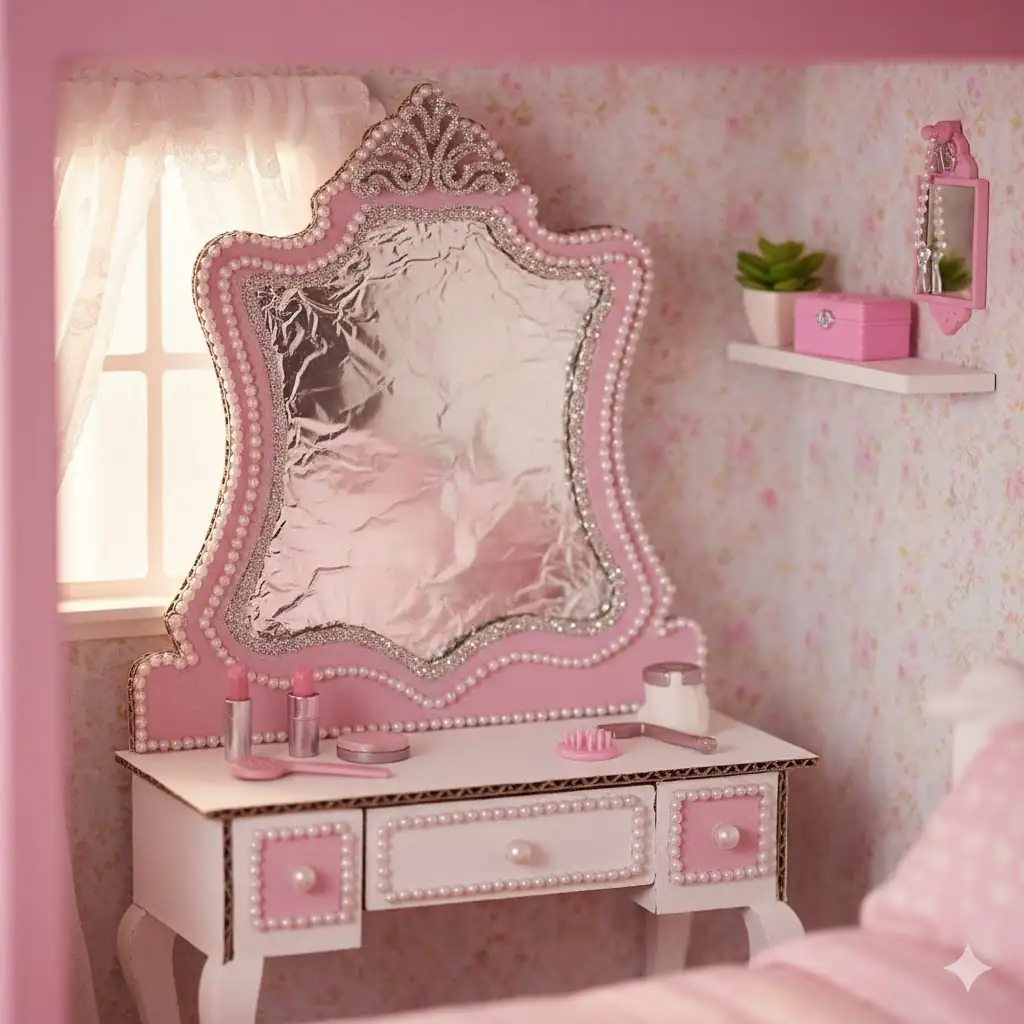
What’s a Barbie bedroom without a vanity? Let’s make one fit for the queen of pink herself.
Materials
- Small cardboard box
- Plastic mirror or foil
- Decorative paper
- Beads or small gems
Steps
- Cut the frame: Use a small box as the base.
- Make the mirror: Cut a rectangle of foil and glue it on.
- Add legs: Use folded cardboard or popsicle sticks.
- Decorate: Stick on gems, lace, or tiny beads for that glamorous touch.
- Add accessories: A small bead becomes lipstick. A paper circle becomes a blush palette.
Every Barbie deserves her glam station — because, let’s be real, even dolls need a self-care corner. 💅
7. DIY Barbie Bookshelf — For Her Tiny Library 📚
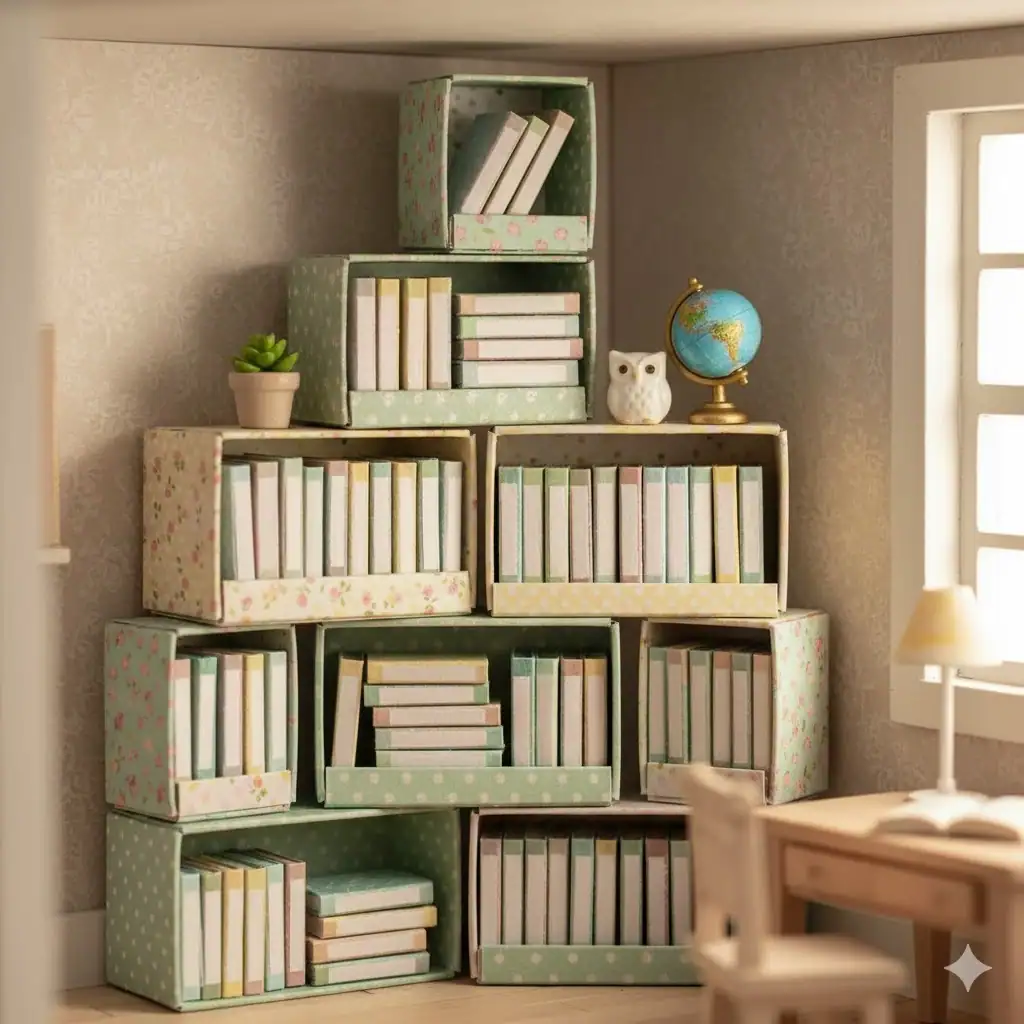
Does Barbie read? Of course she does! Let’s make her a bookshelf that screams “educated and fabulous.”
Materials
- Matchboxes or mini cardboard boxes
- Decorative paper
- Glue and scissors
Steps
- Stack matchboxes: Glue 3–4 matchboxes vertically to form shelves.
- Wrap it: Use patterned paper or washi tape for design.
- Add mini books: Fold small colored papers into tiny books.
- Decorate: Add tiny items like a vase (made from beads) or faux plants (from green paper).
It’s ridiculously easy — and yes, it makes Barbie’s study room 100x cuter.
8. DIY Barbie Kitchen Set — Mini Chef Goals 🍳
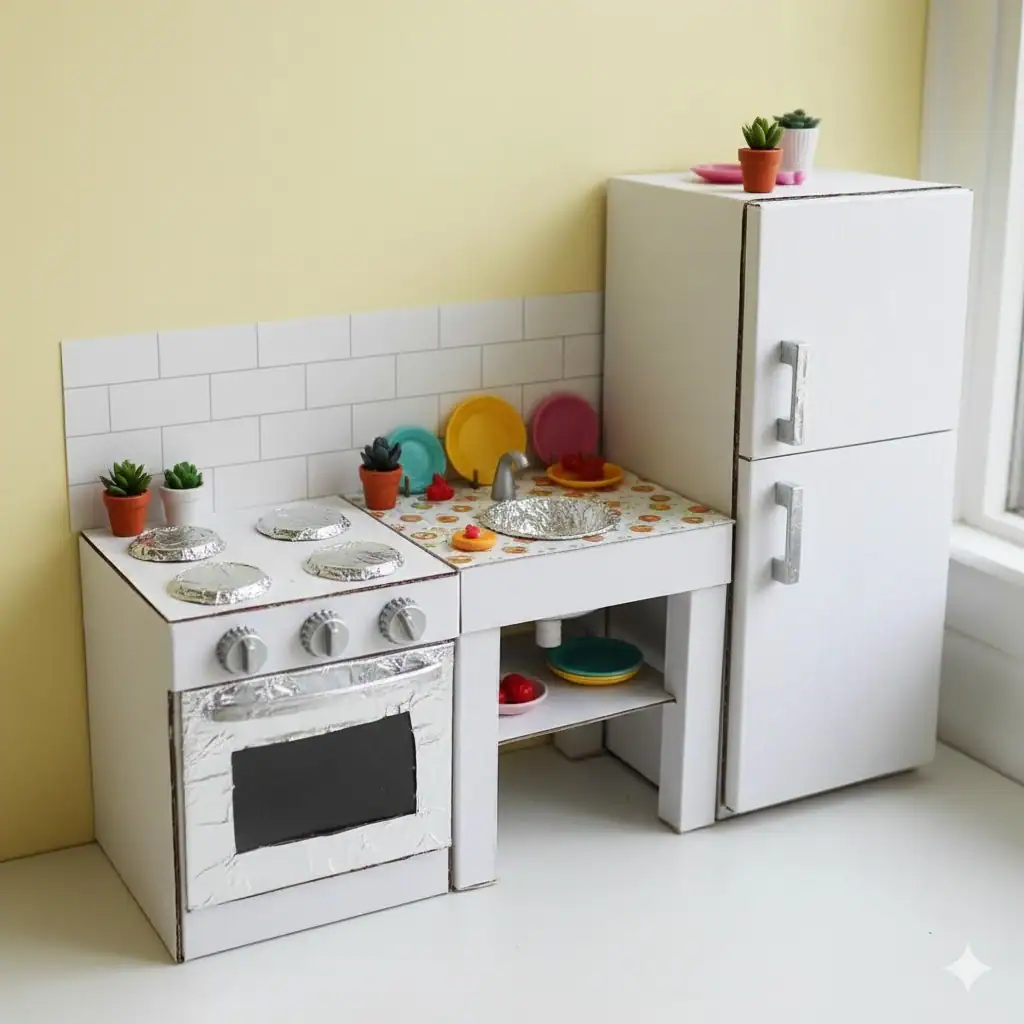
Ready to upgrade Barbie’s kitchen? You can make her a stove and fridge that actually look like they belong in her dream house.
Materials
- Small cardboard boxes
- Bottle caps (for stove knobs)
- Aluminum foil
- Markers and glue
Steps
- Make the stove:
- Use a small box.
- Draw or paint burners on top.
- Add bottle caps as knobs.
- Make the oven door: Cut a small flap and cover it with foil for a realistic oven look.
- Make the fridge:
- Stack two boxes vertically.
- Add handles using straws or paper clips.
- Cover with foil or white paper.
It’s adorable, functional, and totally Instagram-worthy. (Because why not show off Barbie’s new kitchen setup, right?)
9. DIY Barbie Desk and Chair — Work-From-Dollhouse Setup 💻
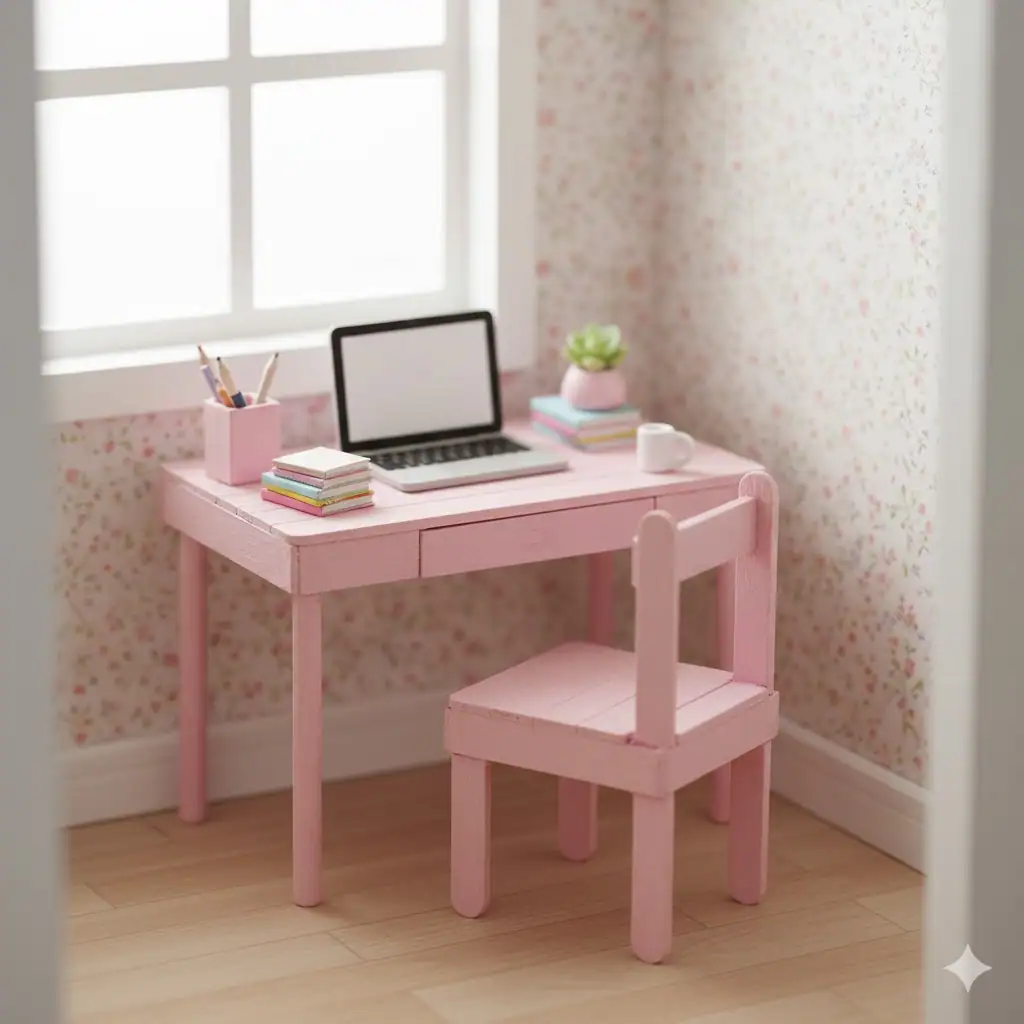
Even Barbie has meetings (probably with Ken about who’s doing the laundry). Let’s make her a cute little office setup.
Materials
- Cardboard
- Popsicle sticks
- Small box (for drawers)
- Paint and glue
Steps
- Cut the desk shape: Use cardboard for the top and legs.
- Add drawers: Use a mini matchbox for storage.
- Paint and design: Add pastel or gold paint to give it that elegant look.
- Make the chair: Glue four popsicle sticks for legs and one for the backrest.
It’s a minimalist setup, but trust me — it makes Barbie look like a total boss babe.
10. DIY Barbie Bathtub — Because Even Dolls Deserve Spa Days 🛁
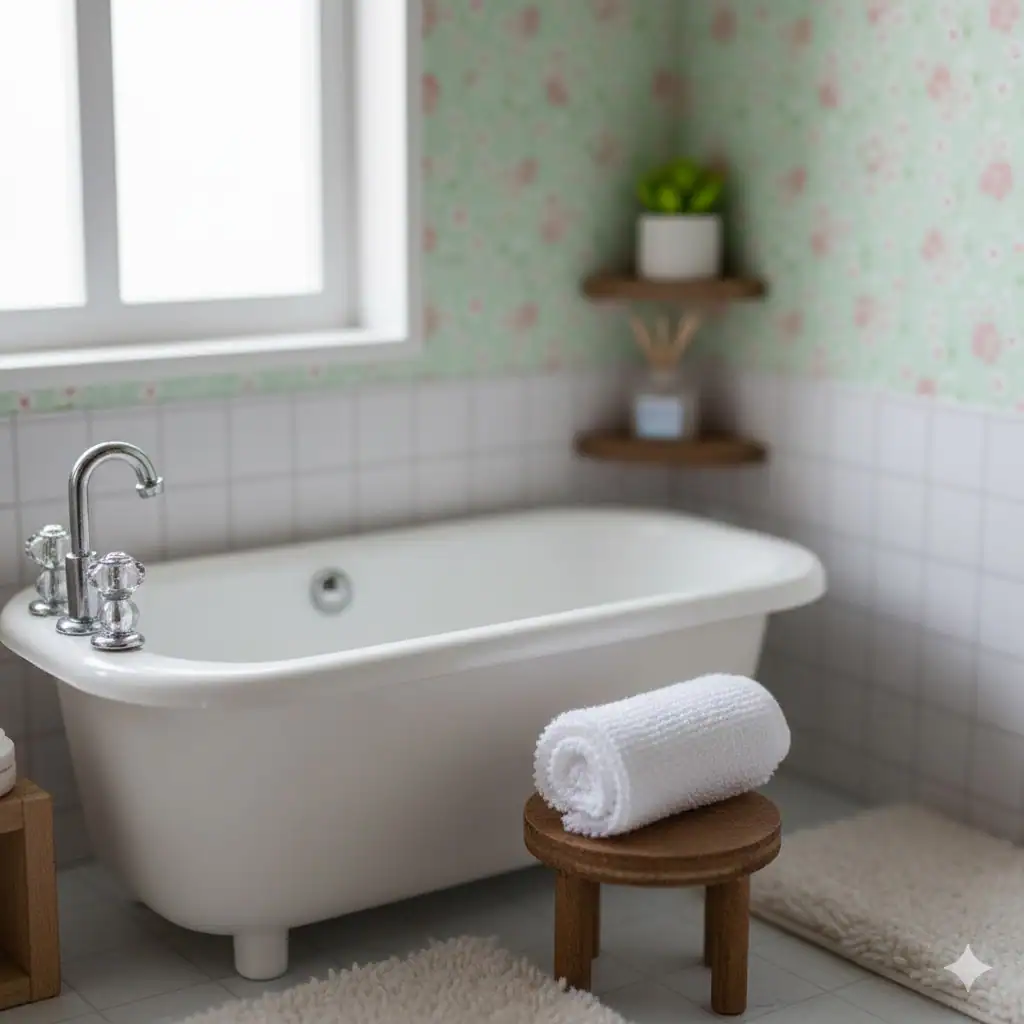
You’ve reached the finale — the Barbie spa. Let’s end strong with a DIY bathtub that’s surprisingly easy.
Materials
- Plastic container (from butter or yogurt)
- Paint
- Aluminum foil or beads (for faucet)
- Glue
Steps
- Cut the container: Trim the edges to make a bathtub shape.
- Paint it: Use white or pastel pink for that clean aesthetic.
- Add details: Use foil to make a mini faucet or glue on beads as taps.
- Decorate: Add a tiny towel or sponge made from felt.
It’s so cute you’ll wish it came in your size. (Sadly, it doesn’t — I checked 😜.)
Bonus Tip: DIY Barbie Accessories
If you’re on a roll, why stop here? You can easily make:
- Mini rugs from old cloth or felt scraps
- Curtains using lace and straws as rods
- Mini lamps from bottle caps and toothpicks
These finishing touches make Barbie’s house go from “cute” to “magazine cover worthy.”
Final Thoughts — Your Barbie’s Dream House Is Now Pinterest-Ready! 🌸
See? You don’t need fancy kits or pricey dollhouse stores to create adorable DIY Barbie furniture. All it takes is a bit of imagination, some glue, and maybe a few “oops” moments (we’ve all glued our fingers at least once, right?).
Making Barbie dollhouse furniture isn’t just about saving money — it’s about creativity, bonding, and a little nostalgia. Whether you’re crafting with your kid or reliving your own Barbie days, these mini projects bring pure joy.
So go ahead — grab those cardboard scraps and let your inner designer shine. Who knows? You might end up creating a Barbie mansion that even Mattel would envy. 😉
Keywords naturally included: DIY Barbie furniture, Barbie dollhouse ideas, Barbie room décor, Barbie furniture crafts, mini furniture DIY, Barbie home decoration.